Showing posts with label fashion. Show all posts

Sunday, February 10, 2013

Med School Formal (aka med school prom)

Sunday, February 10, 2013
Hello! I apologize for the long absence. I've had a great month on my pediatrics rotation... so many incredible kids! Unfortunately, I also got a couple of nasty colds. No matter how hygienic I am with hand washing, you really can't predict when a kid will cough or sneeze in your face during your physical exam. Anyway, over the weekend, we had our annual medical school formal. Here are some pictures from the event!


 A few ladies from the Keytones - our a cappella group!


We had a great time and are looking forward to next year - our last one!


Sunday, October 28, 2012

Halloween, Hall Monitor Style

Sunday, October 28, 2012
Hi Friends!

Hope you're getting excited for Halloween this Wednesday! Over the weekend, we attended a Halloween/Birthday party and it was a blast! The hubby and I love coordinating our costumes and getting creative. This year, we decided on hall monitors, which is something we'd done before for a sorority dance in college. We recycled the accessories, headed to Target's clearance section, and got to work!


Andrew decided on a cardigan that would clash with a button-up shirt. He paired that with some khaki pants, rolled up at the ankles, of course.


I purchased a pink dress from the girl's clearance section for $5.08, and wore it with cream tights.


We had hall monitor sashes from college, but I decided to make new ones since the originals weren't in the best shape. I used some white fabric, folded it in half, and sewed it to itself to make the sash thicker. Then I cut out "Hall Monitor" letters from black felt, and hot glued them onto the sashes (much faster than sewing!) Finally, I used hot glue to attach the two ends of the sash to each other.


Add glasses, a cheap bow tie for Andrew, and pigtails with a headband for me, and we were good to go!


The party was a ton of fun, with lots of dancing, as always. 


(To be clear, these are not real cigarettes... smoking is bad for you!)


The best part about dressing as hall monitors is we got to dance super nerdy, which comes naturally to us :)


Linking up at


Thursday, September 20, 2012

Simple Bow Tote

Thursday, September 20, 2012
Hello!
I hope you are having a lovely end to your summer and are getting excited for autumn! For a fun project, I made a simple bow tote to match my bow clutch.


I followed the instructions provided in this tutorial, but made some modifications to personalize it for my own needs. She really does a wonderful job explaining her steps!


For my fabric, I used the same neutral canvas and polka dot lining as I did for the clutch.


I also painted my canvas fabric with blue fabric paint to match the clutch.


The modifications I made included increasing the dimensions of the bag slightly, sewing two inside pockets, securing the flaps with buttons, and using two straps instead of one. I liked the idea of a yin yang shape, but decided the pockets and extra strap would be more practical for school and other uses.


I used orange and white buttons to close the pockets using the little yin yang flaps already part of the original design. 


The two straps are made of saddle string. I measured them to size and attached them with rivets. Unfortunately, I don't have a rivet hole punch, but I was able to use a mini screw driver to create holes that the rivets would fit into. (If you are going to use rivets, I definitely recommend getting a hole punch because it will go much faster!)


That's it! Honestly, I love how it turned out. The bag itself is light weight and durable. It holds my tablet for school as well as my little clutch, keys, pens, phone, and other little things in the pockets.


Let me know what you think!


Linking up at


Saturday, August 4, 2012

Jewelry Holder Picture Frame

Saturday, August 4, 2012
I like necklaces, but I'm not very good at accessorizing. Since I've started my 3rd year of medical school, the most prominent accessory around my neck is my stethoscope. Still, I figured that if I had a better way of actually seeing the necklaces I own, I might be more likely to wear them. 


I picked up a picture frame from Christmas Tree shops, some wood knobs from Lowes, grabbed some scrap fabric and paint from my craft box, and got to work!

This project was really quick! First, I painted the front of the knobs with some light blue paint. Then I took out the glass and covered the back of the picture frame with the fabric. Next I used a drill to make three holes and attached the knobs. Then I used some painters tape to keep the fabric attached to the back of the frame. (This is probably not necessary, but I did it anyway.) Finally, I hung some necklaces and put a hair clip in the corner. That's it!


Much better way to display and utilize necklaces... plus, the fabric matches our bedroom curtains!


Linking up at


Friday, December 9, 2011

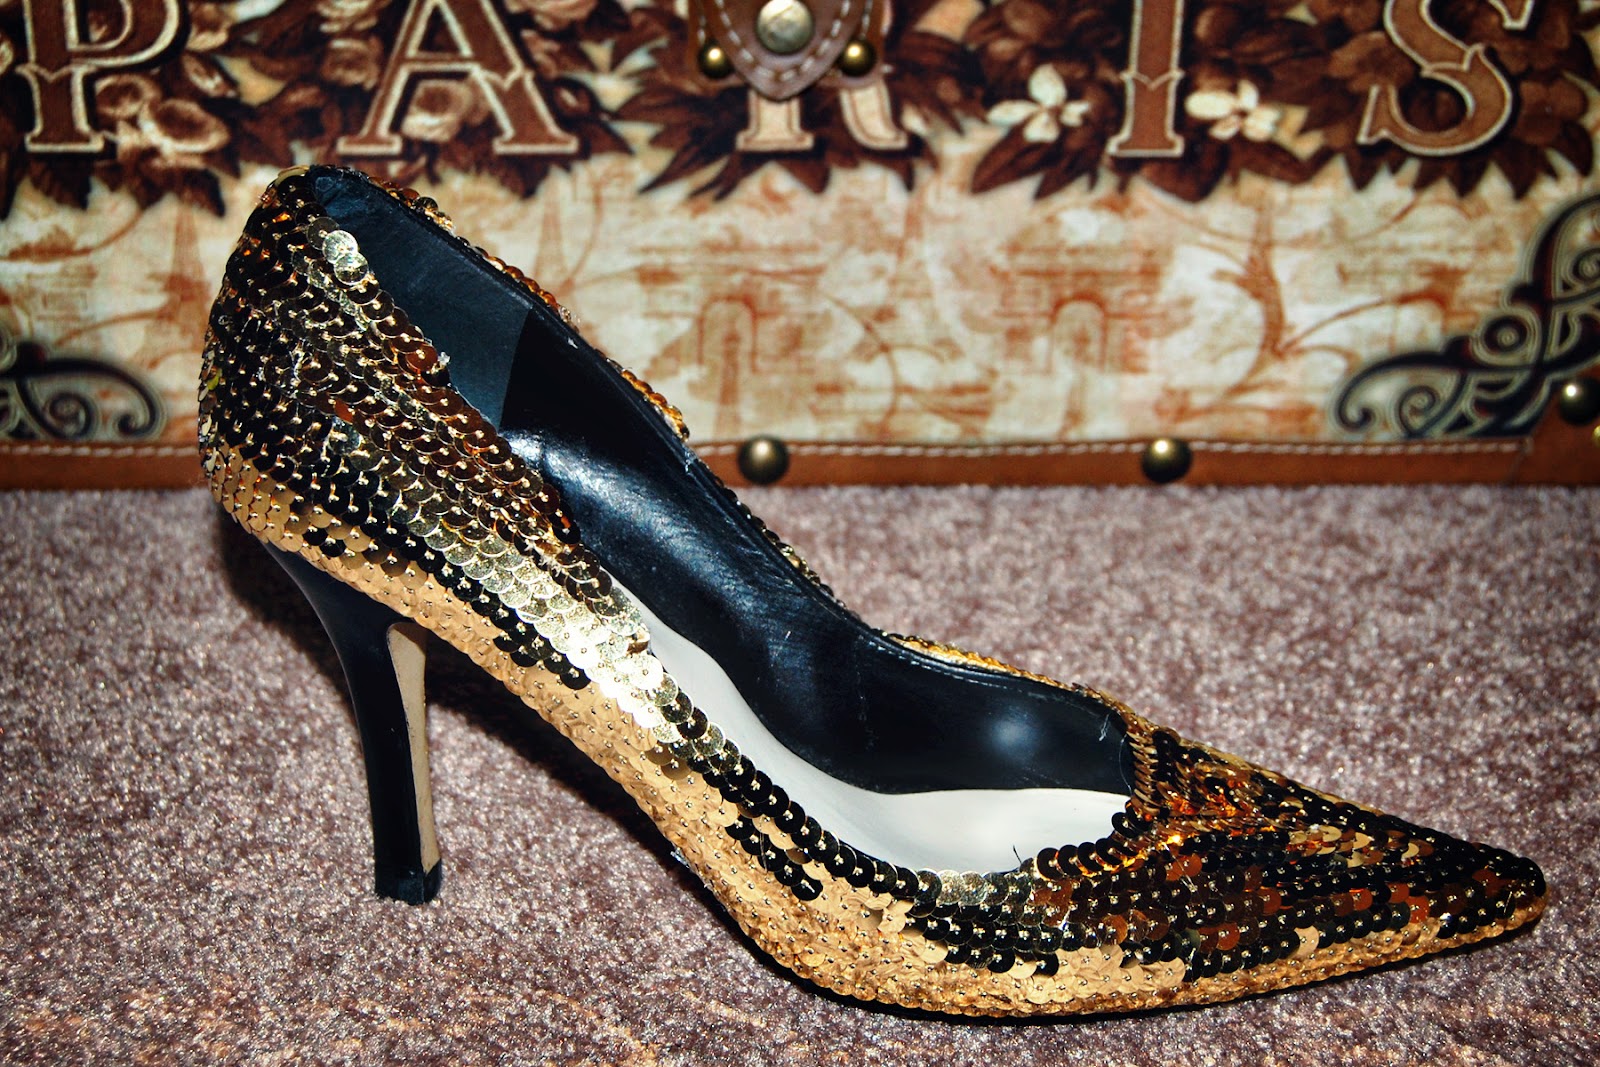
DIY Sequin Pumps!

Friday, December 9, 2011
In case you haven't noticed, sequins are SUPER in style right now. While chatting with some med school friends about our upcoming winter formal dance, we decided it would be awesome to all wear sequins. I thought sequin pumps would be adorable, but they cost $$$, so I decided to make my own, and I LOVE the results!
Pin It

Here are the easy steps:

1. Gather your supplies:
old pumps
approximately 12-14 yards of sequin ribbon (Joann's sells it by the yard or on a spool)
hot glue gun
scissors


2. Start at the base of the back of the heel, apply some glue about 3 inches along the base of the shoe, and attach the sequin ribbon. If you find that your glue is drying before you attach your sequins, just work in smaller sections. You'll get better with every row, trust me!


3. Continue gluing all the way around the base of the shoe until you get back to where you started. Then do a second row right on top of the first one and so on and so on.


4.  The tricky part comes when you have no more side of shoe left to sequin, and the top still has unsequined areas. I worked in a triangle, from the outside toward the center of the unsequened area, and then made a little spiral over the very top.


 5. After you finish the top of the shoe, you'll have to finish the back of the heel as well. I cut the sequin ribbon and put a drop of hot glue on the free sequin end to keep it from unraveling. Then I wrapped it around the back of the shoe and cut + glued it on the other side.

6. Repeat this as many times as is necessary to complete the back of your shoe!

7. I left my heel black (mostly because I ran out of sequins), but I may decide to add more sequins or paint it gold at a later date.


 Adorable, right? And, I only spent about $10!


Linking up at Crafty, Scrappy, Happy


Related Posts Plugin for WordPress, Blogger...